
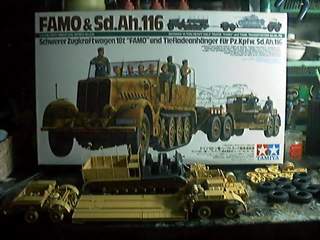
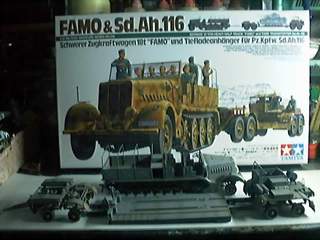
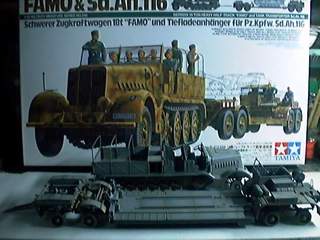

Let me start with Tamiya's Famo & Sd.Ah.116 1:35 scale and by-pass the price and origin of the model because I think that each person has his own source where models can be found within the budget, and this model I got from the Webmaster.
Open the box..... inside is packed with considerable amount of parts, but I'm not so worried, because it's been known that Tamiya's parts fit together very well most of the time, the instruction book is well detailed and easy to understand. This model has both plastic and metal parts.
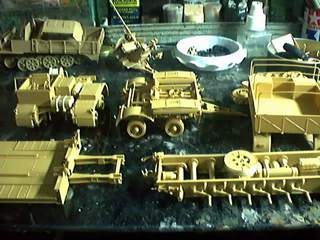
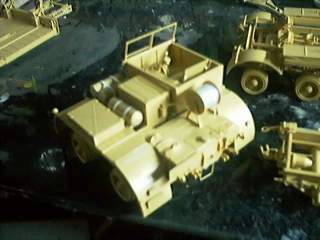
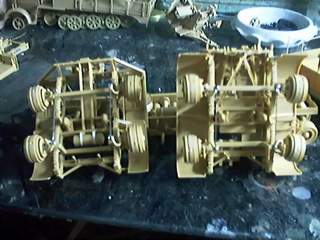
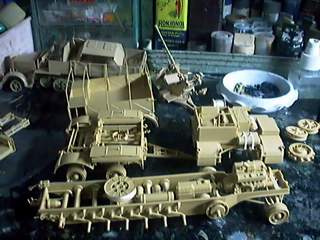
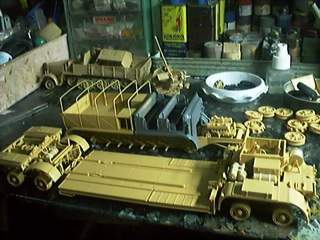
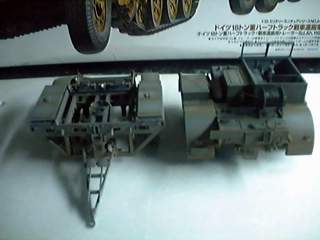
Start assembling....... the FAMO hauler first by distributed assembling in various sections for convenience and ease in the painting process later on. All sections were assembled following the instruction book, by assembling the sections of chassis, engine, rear deck and driver's compartment separately (see pictures). After finishing the FAMO hauler, I began assembling the Sd.Ah.116 Tank Transporter. This one seems to be have more details than the FAMO hauler. The process in assembling is still the same, i.e., following the instruction book, but sections will be painted separately and will be assembled together later on. (see pictures)
Painting...... First of all I brought fine sand mixed with color that children use in laying over pictures,
which can be bought in stationery store, it's cheap and volumous... can be used for a long time,
to mix with new color so that it looks like earth-brown dirt color (brown, yellow, white =30+30+40%),
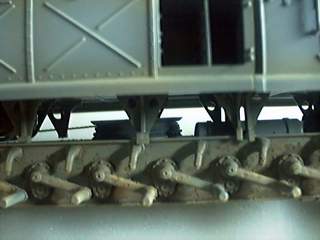
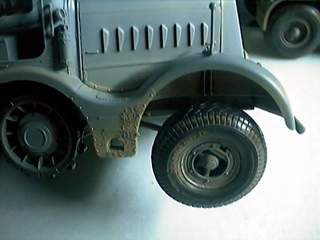
then apply it to the underbody so as to imitate the dirt traces of mud and sand attached to the body
(see pictures) and on all caves and corners, then mixed the color using the same formula but thinner
and sprayed it over the regions where the sand had been applied. After all that I started painting the body,
for this model I chose to make it into German Gray color by using "Lukas" brand water-based color which
I had bought from Studio 9 model shop of "Big Brother Moo" (Arjarn Tang) since the time I worked there.
Personally, I like this German Gray color very much because it looks real German. Ha!. But I have to
tell that water-based color is somewhat difficult to airbrush, and it dries slowly. Well, it all depends on
each person's style and preference...
I airbrushed German Gray color over the body of the hauler and the transporter, after that I mixed the old
color to be lighter by adding white color and mixed thinly, airbrushed over the wide areas of the model.
No, not yet finished, I mixed this second level color with white color so that it's even lighter than ever,
then airbrushed to get three different tones of color (dark, middle, light) all over the body, then mixed
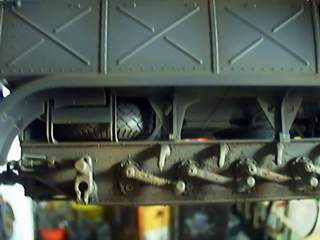
the German Gray base color thinly and sprayed it over all body. After that I took the old earth-brown
dirt color (brown, yellow, white =30+30+40%) and mixed thinly, airbrushed on the caves and corners
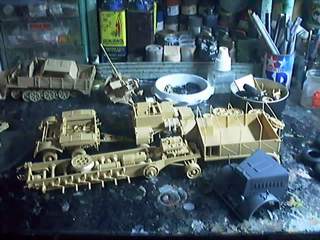
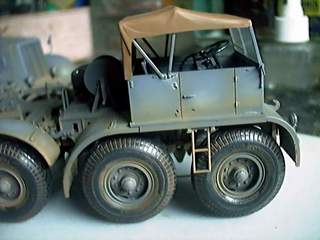
of the model (see pictures). Most of my painting process is finished now.
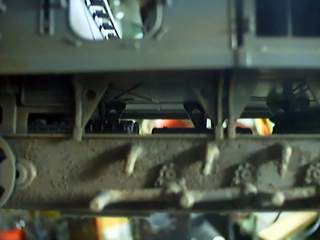
Touching up........ Finished with painting, I then put the sections together both the Famo and the Tank Transporter Sd.Ah.116. When completed, I then mixed the color to be used in dry-brushing, where I used black+brown (70+30%). I used flat brush no.16 & 12 (Sa-nga Mayura) to dry-brush the rim and corner areas (see pictures). After dry-brushing, it can be seen clearly that the model looks thin and very much like metal. This method of mixing and dry-brushing works well with models that have only one base color. Anyway, my friends, you may try this out, and whatever results you get you may drop by and share with us, OK?.
Action....... Took the old color used in dry-brushing and no.1 brush to make wears & tears (see pictures), I tried to apply not to overscale or apply too much, worked on all over the body, and got a piece of model with action in itself. After that I mixed the Winsor oil color (#35) with any brand of body powder using "Ronson" lighter fuel as solvent, mixed thinly and used the method of letting the color flow by itself along the caves and corners and knotheads. When the color dried up we will see the trace of the powder, I used the old color for dry-brushing and dry-brushed over the trace of the power and see what I got (see pictures).
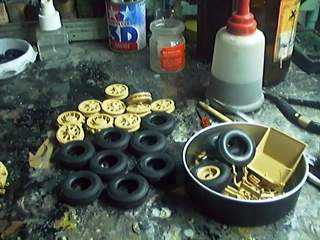
Track links and wheels......... This model, Tamiya created individual track links which are also movable, well done!. The tyres are hollow rubber tyres which helps reduce the chances of breaking up. First of all I painted both track links and tyres with the sand color mixed in the initial stage all over, then painted with the earth-brown dirt color (also mixed earlier), then I took the color which was mixed for dry-brushing to dry-brush all over the tracks and tyres, then soaked with Winsor oil color no.35+2 (50+50%) and rubbed out. Finally, I mixed silver+white color (90+10%), using white color so as to reduce the glaring effect of the silver color, then used the mixed color to dry-brush the rims of the track links and the parts which are run over by roadwheels. The result is what you see here (see pictures). The last process was applying the decals, I waited until the decals really dried up, then painted the sand color thinly over the decals so that they don't stand out or seems too new to be realistic, followed by painting flat clear color all over the model.........
How about that, my friends?. Up to this point I finished making the Famo & Sd.Ah.116 1:35 of Tamiya. Whatever you think you may make suggestions. But anyway I have to tell you that all this is only the presentation of my works and the methods I used in working. I don't mean to present as prototype or as the best methods in making models. Any friends who have suggestions, complaints or compliments please feel free to jam the Webboard so that this Page will live on for a long time..............